Showing posts with label brunch. Show all posts

Monday, 4 May 2015

Jammy Blueberry Cupcakes


Continuing on the blueberry theme! I can't get enough of those little blue superfruits at the moment, so here's another recipe that I made up last night using blueberry preserve! I will stop soon, promise. (Then it will be raspberries...just joking. Or am I?)
I'm still using the Bonne Maman Wild Blueberry Preserve for my recipes - it has whole berries in it which makes it taste pretty authentic but I think fresh berries would create a much tangier/fruitier taste, where preserve tastes mostly of sugar! But despite that, these little cupcakes are a mouthful of joy, great with a cup of tea or for a breakfast on the go. They're like a blueberry muffin but smaller!

This recipe makes 6 cupcakes, double the quantities if you'd like a batch of 12.
You could use normal paper cupcake cases but I used a square of greaseproof paper for that rustic look.

Ingredients
6 tbsp self-raising flour
4 tbsp sugar
4 tbsp butter
1 large egg
1.5 tbsp milk
about 5 tsp blueberry preserve


Preheat the oven to 180 degrees Celsius/160 for fan assisted ovens/Gas Mark 4.
Grease your cupcake tray with oil.

  1. Spoon the flour and sugar into a bowl and mix. I ran out of caster sugar so I used demerera, which I think actually makes it more breakfast muffin-y and golden!
  2. Add the butter (softened/room temp) and the egg (beaten) and beat well. Add in the milk and keep beating the mixture until it is a smooth, creamy consistency. Then add in 2 generous teaspoons of blueberry preserve and stir it in until the mixture is a grey-blue-lilac colour! Put your preserve back in the fridge to cool down.
  3. If you're using greaseproof paper instead of cupcake cases, cut 6 squares that fit your cupcake tray and grease the non-shiny side of each with oil. Put the squares, shiny side down, into the cupcake tray by pressing them down and folding any bits that need to be folded for them to fit the tray. Remember it doesn't have to look perfect because we're being rustic!
  4. Put a dessert spoon of cake mixture into each case and poke it a bit to make sure it reaches the edges of the case. 
  5. Drop about half a teaspoon of (fridge temperature) blueberry preserve into the centre of each case. This will create the jammy middle! 
  6. Top each jammy centre with about half a dessert spoon of cake mix until you've used it all up and make sure the preserve is completely covered. Do not stir the mix inside the cases because then the jammy centre won't work!
  7. Put your lovely cupcakes in the oven. Mine took about 30 mins but all ovens are different, so cook them for 15-20 mins and then check every 5 mins until they're golden on top.
  8. Leave them to cool a little on a wire rack or a plate and then enjoy! They're very tasty when they're still warm.


Saturday, 2 May 2015

Chocolate and Blueberry Pancake Stack


We all love pancakes. I've seen a lot of amazing recipes recently for super healthy, gluten-free, wholewheat pancakes, and I seriously want to try them, but right now I only have my usual store cupboard ingredients, so I made the (fairly) unhealthy version. Sorry clean eating people! Maybe cook these on your cheat day. To be fair, even this recipe is far healthier than buying pre-made cakes, sweets or even pre-made pancakes because you can control exactly what goes in them and there are no nasty additives!

This recipe makes about 8 american-style (small and thick rather than thin like crepes) pancakes.
NOTE: no fancy equipment needed for this! I whisked it with a fork because I couldn't be bothered to find a whisk.

Ingredients
2 free range eggs
half a cup of self-raising flour
half a cup to a cup of milk (I used semi-skimmed)
pinch salt
1 tbsp sugar (I used demerera)
2 tbsp wild blueberry preserve
2 tbsp Nutella

  1. Crack your eggs into a mixing bowl or glass jug. I would strongly recommend using a jug to save on washing up! Whisk them until the whites and yolks are combined. 
  2. Add the flour bit by bit, whisking as you go, until you have a thick cake-batter consistency that's quite difficult to whisk.
  3. Now add your milk bit by bit until the mixture is runny but still reasonably thick. It should be a pale colour like normal pancake batter. Make sure it's mixed really well and stop when little air bubbles appear in the mixture when you let it rest for a few seconds. Add in a pinch of salt and the sugar and mix.
  4. Heat up a frying pan on the stove on a medium-low heat. I don't use oil because it's a non-stick pan and it would just make the batter spread out more which is not what we want for this type of pancake!
  5. Pour a small puddle of batter into the middle of the pan. Don't be tempted to swirl it around like you would with a crepe. It will spread out a little by itself as it cooks.
  6. When bubbles have appeared, flip it with a spatula. You should see this...
  7. It won't take long for the other side to cook, so keep checking it. Once it looks like this, it's ready...
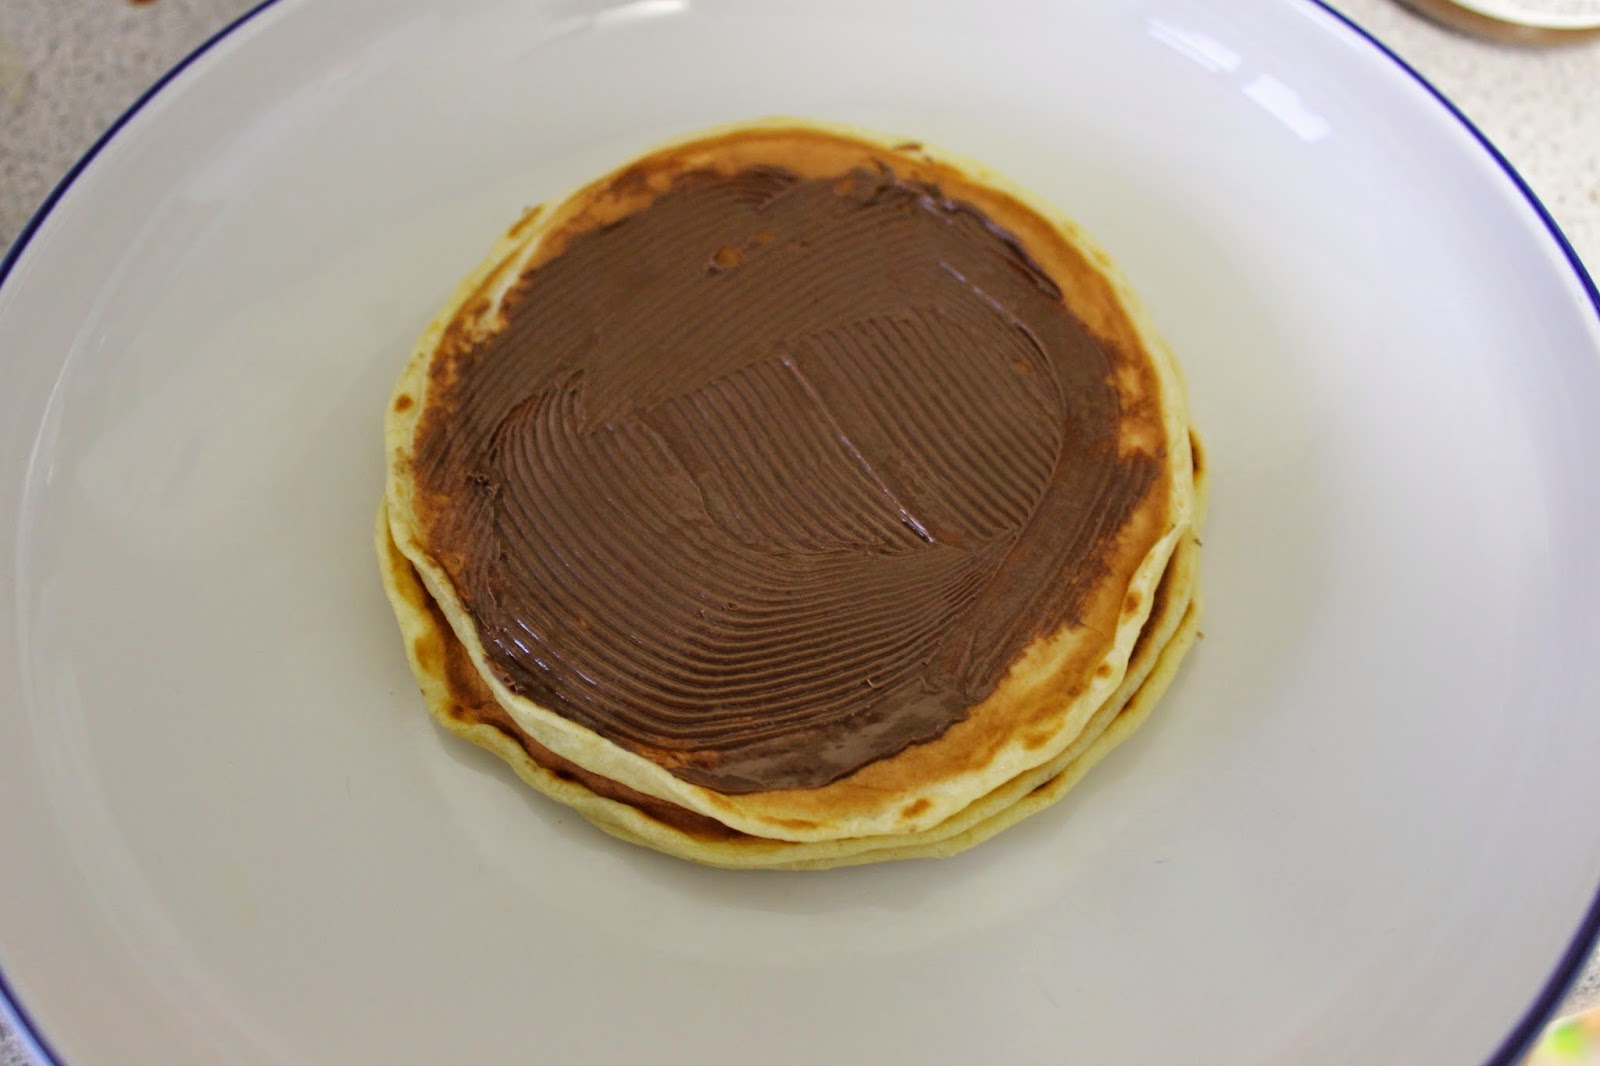
  8. Slide your pancake onto your serving plate and pour in your next one. While you're waiting for the bubbles, spread your first pancake with a thin layer of nutella. It should spread really easily while the pancake is still hot. Then add the next one when it's ready and repeat until you have a yummy stack! Try not to eat them as you go along...
  9. Once you've done your last pancake, don't put nutella on the top, but instead heat up the blueberry preserve in a small pan over a low heat. I used Bonne Maman Wild Blueberry Preserve, which I found is far, far too sweet to go on toast but I plan to use it for baking and it goes amazingly with pancakes. Keep stirring it over a low heat until it starts to go runny and hot. Just before it starts to bubble, pour it over the top of your pancakes and encourage it to dribble down the sides. Now they're ready to gobble! 

Enjoy!


Saturday, 7 March 2015

Shakshouka Dipping Eggs


I've seen so many recipes lately for exotic breakfast and brunch dishes and have struggled to make the leap away from the classic Full English, crispy warm pastries or American-style fluffy pancakes, but this morning called for something a little more exciting. So I whipped up my own version of a recipe I read a few months ago on The Londoner, adjusted for student living by adding extra laziness and taking away some ingredients! It took me about half an hour in total to prep and cook and it went down very well with a grateful housemate - who I'd persuaded to join me on a very messy Friday night out with the promise of breakfast!

Serves 2

Ingredients:
1 red pepper
1 tbsp olive oil (or any oil suitable for frying)
1 carton/tin chopped tomatoes
2 or 3 large eggs - depending on how hungry you are!
Oregano and/or basil
Mild chilli powder
Worcestershire Sauce
Salt & Pepper
4 or more slices of bread for toasting, and butter!


1. Heat up the oil in a small-medium sized frying pan or skillet. Chop your pepper into small-ish chunks, remembering not to include the seeds! 
2. Soften the chopped peppers by frying them gently for a few minutes. I use the colour of the oil as a clue to whether they're soft enough - it goes orange from the juice when they're cooking.
3. Add the chopped tomatoes and stir. To make sure you don't leave any in the carton or tin, put a little water in it and swirl around before pouring into the pan. 
4. Add a splash of Worcestershire Sauce, about a teaspoon of mild chilli powder (or more if you want it extra spicy), and herbs to taste. My tomatoes had basil in them already but you could add your own to plain tomatoes, and oregano always works amazingly. Salt and tomatoes are best friends! Be generous with the salt at this point but add it gradually and taste as you go along to make sure it's not too much.  Let the mixture bubble for about 5 mins to cook off any excess water.
5. Crack in your eggs! This is the exciting part. My pan fits about 3 large eggs but it was a generous helping for two - 2 eggs would be fine. Try not to break the yolk so that you can dip in later.
6. Let it bubble away on a medium heat until the eggs are cooked - you will be able to tell because the egg white will no longer be transparent, just like poaching eggs in water. 
7. Season with black pepper and extra salt if needed, then serve in the pan (on a chopping board so you don't scorch the table!) with a pile of buttery toast to dip with. Serious comfort food.


Let me know if you try it by commenting below! 


Copyright © 2014 This Side of Paradise