Showing posts with label cooking. Show all posts

Saturday, 2 May 2015

Chocolate and Blueberry Pancake Stack


We all love pancakes. I've seen a lot of amazing recipes recently for super healthy, gluten-free, wholewheat pancakes, and I seriously want to try them, but right now I only have my usual store cupboard ingredients, so I made the (fairly) unhealthy version. Sorry clean eating people! Maybe cook these on your cheat day. To be fair, even this recipe is far healthier than buying pre-made cakes, sweets or even pre-made pancakes because you can control exactly what goes in them and there are no nasty additives!

This recipe makes about 8 american-style (small and thick rather than thin like crepes) pancakes.
NOTE: no fancy equipment needed for this! I whisked it with a fork because I couldn't be bothered to find a whisk.

Ingredients
2 free range eggs
half a cup of self-raising flour
half a cup to a cup of milk (I used semi-skimmed)
pinch salt
1 tbsp sugar (I used demerera)
2 tbsp wild blueberry preserve
2 tbsp Nutella

  1. Crack your eggs into a mixing bowl or glass jug. I would strongly recommend using a jug to save on washing up! Whisk them until the whites and yolks are combined. 
  2. Add the flour bit by bit, whisking as you go, until you have a thick cake-batter consistency that's quite difficult to whisk.
  3. Now add your milk bit by bit until the mixture is runny but still reasonably thick. It should be a pale colour like normal pancake batter. Make sure it's mixed really well and stop when little air bubbles appear in the mixture when you let it rest for a few seconds. Add in a pinch of salt and the sugar and mix.
  4. Heat up a frying pan on the stove on a medium-low heat. I don't use oil because it's a non-stick pan and it would just make the batter spread out more which is not what we want for this type of pancake!
  5. Pour a small puddle of batter into the middle of the pan. Don't be tempted to swirl it around like you would with a crepe. It will spread out a little by itself as it cooks.
  6. When bubbles have appeared, flip it with a spatula. You should see this...
  7. It won't take long for the other side to cook, so keep checking it. Once it looks like this, it's ready...
  8. Slide your pancake onto your serving plate and pour in your next one. While you're waiting for the bubbles, spread your first pancake with a thin layer of nutella. It should spread really easily while the pancake is still hot. Then add the next one when it's ready and repeat until you have a yummy stack! Try not to eat them as you go along...
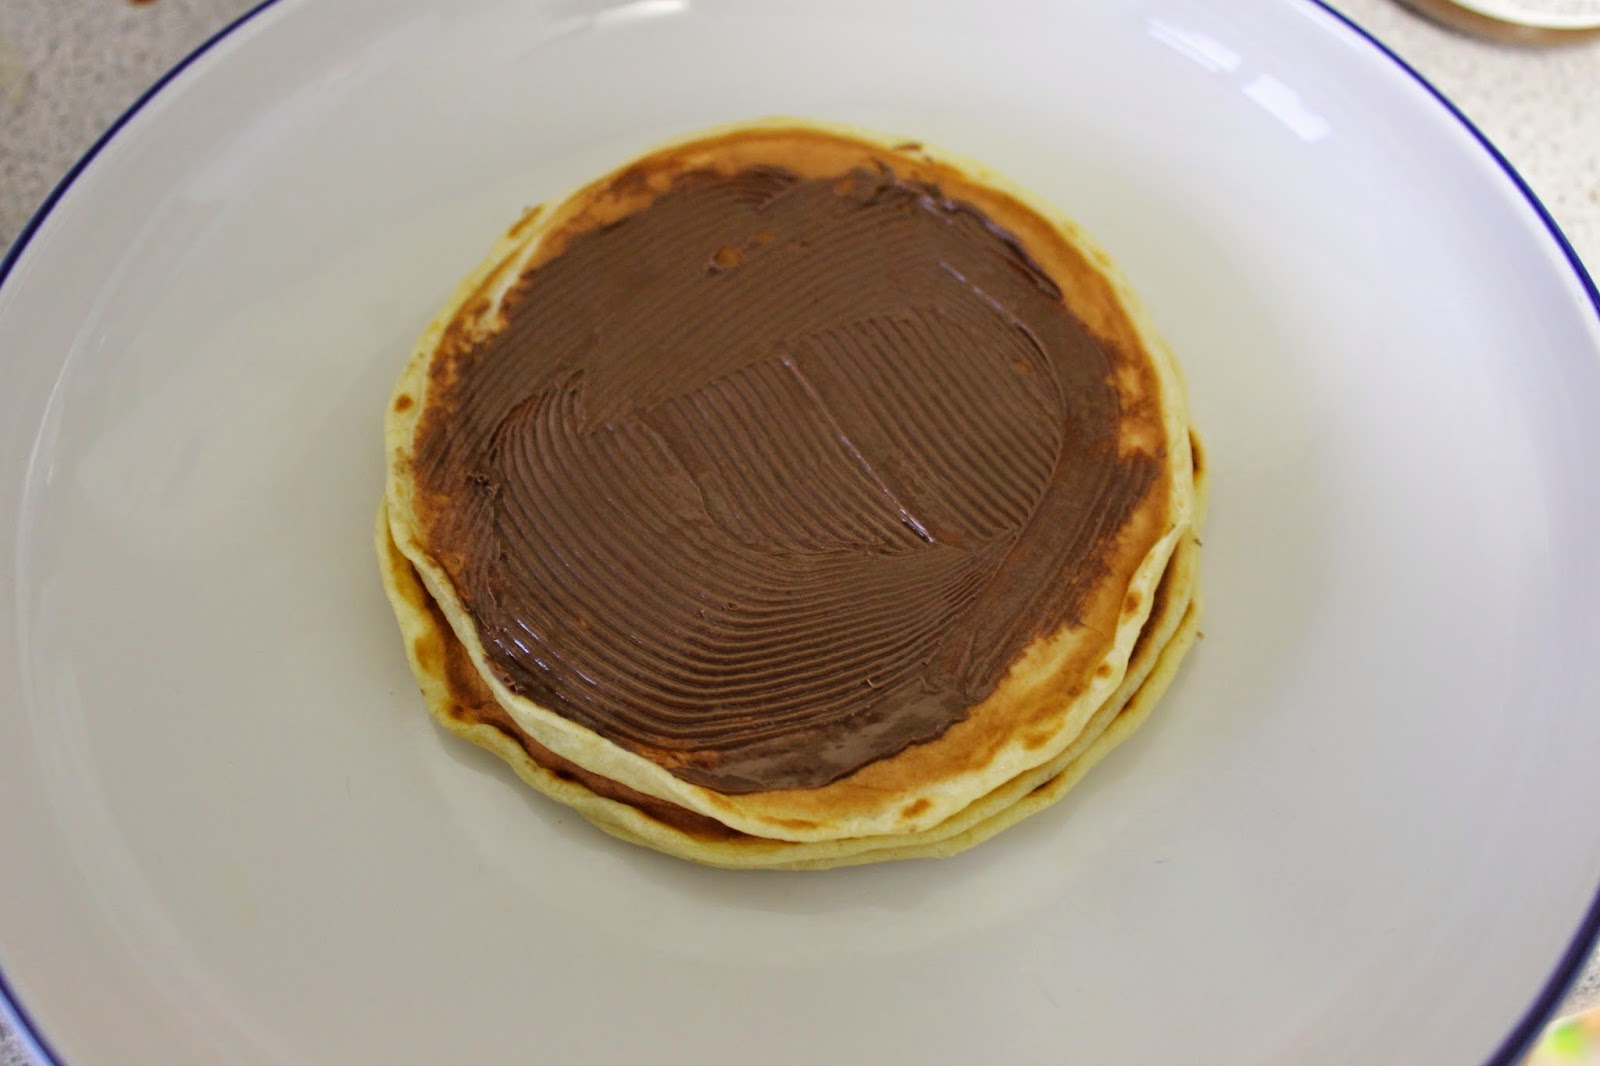
  9. Once you've done your last pancake, don't put nutella on the top, but instead heat up the blueberry preserve in a small pan over a low heat. I used Bonne Maman Wild Blueberry Preserve, which I found is far, far too sweet to go on toast but I plan to use it for baking and it goes amazingly with pancakes. Keep stirring it over a low heat until it starts to go runny and hot. Just before it starts to bubble, pour it over the top of your pancakes and encourage it to dribble down the sides. Now they're ready to gobble! 

Enjoy!


Thursday, 30 April 2015

Caprese Couscous


With Summer coming I've been trying to eat healthily and create light, simple dishes full of lovely British veggies. This Italian-inspired couscous is a really tasty alternative to a green salad and it takes hardly any time to prepare, so great for a quick lunch. I have my own basil plant which you can find in any big supermarket (cheaper than buying bunches of it and far more flavoursome than the dried stuff) and you should always try to buy tomatoes grown in the UK! Unless you're reading from elsewhere in which case buy tomatoes grown in your own country/state where possible!

This recipe serves 1, multiply as necessary for more people. 
It would make a great side dish with pizza!
Prep & cooking time: 10 mins total

Ingredients

2-3 medium sized tomatoes or 6-8 cherry tomatoes
40g (about half a cup) pre-cooked couscous
4 pitted olives
8 mozzarella pearls
1 tbsp balsamic vinegar
3/4 tbsp extra virgin olive oil
2 basil leaves
salt & pepper to season


  1. Pour your dry couscous into a pan and cover with just over the same quantity of boiling water. So if you used half a cup of couscous, you would need just over half a cup of water. Stir, cover with a lid and leave for 5 minutes.
  2. Slice up your tomatoes however you like, halve the olives.
  3. Once your couscous has absorbed all the water, fluff it up with a fork and then scrape it all into whatever you're eating out of, ie. a bowl or pasta dish.
  4. Add your chopped tomatoes and olives to the couscous and mix well so all the tomato juice mixes with the grains. Then add the mozzarella pearls and stir with your fork.
  5. Season with your balsamic vinegar, extra virgin olive oil, and salt and pepper to taste. Shred the basil leaves by tearing them into little pieces and throw them in. Stir well.


That's it! How simple was that?! Enjoy as a quick lunch, a side dish with Italian food or maybe even as a starter with a glass of wine before dinner. Let me know if you try it in the comments section below!


Tuesday, 17 March 2015

Easy Macaroni Cheese


Spring is finally here! Stay tuned for my pick of all the new season goodies out there, but right now I have a recipe I absolutely have to share with you. 
I've been working on my mac 'n' cheese recipe all term. It's something I'd never made before uni and had somehow got to third year without making (other than ready meal versions - one of my absolute favourites is from Amy's Kitchen). When I got round to trying it, it wasn't quite as easy as I'd imagined, and no recipe seemed to help me! So I've been practising and I've finally devised my own really simple, student-friendly version. Let me know if it works for you!

Serves 1

Ingredients
macaroni pasta (your usual quantity for one, I don't have scales!)
1 tbsp olive oil
1 tbsp plain flour
semi-skimmed or full fat milk
1 handful mature cheddar cheese, grated
about 20g grated parmesan (the type you get pre-grated to sprinkle on things)
salt & pepper to season

you will need a whisk!

  1. Throw your pasta into a pan of boiling, salted water. Let this cook while you're making the sauce, for as long as it says on the packet (usually about 10-15 mins).
  2. In a milk pan, heat up the oil for a minute, then sprinkle in the flour. Make sure the quantities of oil and flour are roughly equal. Stir or whisk them together until the mixture looks golden. (This forms a roux - you can use a chunk of butter instead of oil but I never have it in the fridge and oil works equally well). 
  3. Add milk to the pan and whisk on a low heat - I'm not sure exactly how much milk it is, but it's probably about 1.5 large mugs...basically enough to make sauce for one. Use your instincts - you can do it!
  4. Once the sauce is bubbling it will start to reduce. When you think it's thickening, add your cheeses! You can experiment with various types of cheese but I've found that cheddar on its own doesn't really work. Stir in until the cheese is melted in, then season with salt and pepper to taste.
  5. Drain the pasta and pour the sauce over it, then swirl around and make sure the pasta is fully covered in cheesy goodness. 
  6. If you have any willpower to not devour it right now, you can put the pasta in an oven-proof dish and bake it in the oven to make the top go all crispy (sprinkle with extra cheese first) but otherwise, dig in!

Saturday, 7 March 2015

Shakshouka Dipping Eggs


I've seen so many recipes lately for exotic breakfast and brunch dishes and have struggled to make the leap away from the classic Full English, crispy warm pastries or American-style fluffy pancakes, but this morning called for something a little more exciting. So I whipped up my own version of a recipe I read a few months ago on The Londoner, adjusted for student living by adding extra laziness and taking away some ingredients! It took me about half an hour in total to prep and cook and it went down very well with a grateful housemate - who I'd persuaded to join me on a very messy Friday night out with the promise of breakfast!

Serves 2

Ingredients:
1 red pepper
1 tbsp olive oil (or any oil suitable for frying)
1 carton/tin chopped tomatoes
2 or 3 large eggs - depending on how hungry you are!
Oregano and/or basil
Mild chilli powder
Worcestershire Sauce
Salt & Pepper
4 or more slices of bread for toasting, and butter!


1. Heat up the oil in a small-medium sized frying pan or skillet. Chop your pepper into small-ish chunks, remembering not to include the seeds! 
2. Soften the chopped peppers by frying them gently for a few minutes. I use the colour of the oil as a clue to whether they're soft enough - it goes orange from the juice when they're cooking.
3. Add the chopped tomatoes and stir. To make sure you don't leave any in the carton or tin, put a little water in it and swirl around before pouring into the pan. 
4. Add a splash of Worcestershire Sauce, about a teaspoon of mild chilli powder (or more if you want it extra spicy), and herbs to taste. My tomatoes had basil in them already but you could add your own to plain tomatoes, and oregano always works amazingly. Salt and tomatoes are best friends! Be generous with the salt at this point but add it gradually and taste as you go along to make sure it's not too much.  Let the mixture bubble for about 5 mins to cook off any excess water.
5. Crack in your eggs! This is the exciting part. My pan fits about 3 large eggs but it was a generous helping for two - 2 eggs would be fine. Try not to break the yolk so that you can dip in later.
6. Let it bubble away on a medium heat until the eggs are cooked - you will be able to tell because the egg white will no longer be transparent, just like poaching eggs in water. 
7. Season with black pepper and extra salt if needed, then serve in the pan (on a chopping board so you don't scorch the table!) with a pile of buttery toast to dip with. Serious comfort food.


Let me know if you try it by commenting below! 


Tuesday, 6 January 2015

DIY Personal Pizza


January is upon us and many of you will be attempting to start a super healthy diet. I'm proud of you, keep at it! But, unfortunately, my love of good food is a little too strong for me to eat nothing but kale and quinoa for the foreseeable future. My car decided to play up today and after a scout round the kitchen I realised that we had very little in the way of food for lunch. So, rather than risking a trip out to the shop, I devised a super-fast and simple pizza recipe for one which you should be able to whip up with whatever you have in the fridge. You can make it as healthy or as unhealthy as you like, but it's definitely better than ordering in because you know exactly what's in it!

Ingredients
for the dough
70g self-raising flour
pinch of salt
15g butter (if you don't have block butter, spreadable stuff eg. lurpack works fine!)
40ml milk
olive oil 

for the topping
tomato puree/ passata
cheese (of your choice)
oregano (dried)
salt and pepper, to taste
any toppings you want!

You can make the pizza for more people by multiplying the quantities!

  • Preheat the oven to 160 degrees C (fan assisted).
  • Pizza dough can be quite tricky, and lots of recipes use yeast. It took me a while to get it to the right consistency, so be patient! 
  • First, sieve the flour into a mixing bowl and add a little salt. Drop the butter into the bowl and rub into the flour with your fingers until it is the consistency of breadcrumbs. Put flour on your hands so the dough doesn't stick to your fingers, then pour in your milk slowly and knead into a dough. If it's really sticky, keep adding extra flour bit by bit until it's a soft, stretchy dough. Equally, if it's too dry and not sticking together, add more milk. 
  • Grease a baking tray with oil and stretch the dough out into the shape you want - if you're feeling unconventional maybe make a rectangular pizza! Or a heart shape if you want to impress your other half. (Side note - I was once presented with a heart-shaped pizza at a restaurant in Florence and it made my day. Definitely a great romantic gesture for food lovers.) It should be about 1cm thick but really, the thinner the better. Just make sure there aren't any holes!
  • Now the fun begins. Spread a few teaspoons of tomato puree (Or a dessert spoon of passata if you're using it) all over the base, leaving about 1cm of crust round the edge. I usually add chopped garlic because I think it goes amazingly with tomato. I then added 4 quartered cherry tomatoes, but if you're using fresh tomatoes be careful not to use too many because the juice will make the dough go soggy.
  • Then sprinkle on your cheese of choice - be careful if you're using mozzarella (the fresh white type, not the grated yellow stuff), because it is very wet and will also make the dough go soggy if you use too much. I used flakes of cheddar, but you could also use goats cheese (yum) or whatever you fancy.
  • Add any other toppings you like. You can use anything that's already cooked, so that means the scraps of leftover roast chicken in the fridge, salami, cooked ham, tuna, sweetcorn, whatever. Do NOT use any raw meat or fish. Just don't overload the dough because it won't rise and you don't want an uncooked pizza - use a little of each ingredient and distribute it evenly across the whole base.
  • Sprinkle a generous pinch of oregano over the top and add salt and pepper to taste. Fresh basil leaves also work really well if you have them. Drizzle with a little olive oil (preferably extra virgin) and bung in the oven for about 20 mins, or until the dough is golden round the edges. Even if the toppings looked cooked, the dough is more important!
Serve with your condiments of choice, or a generous heap of coleslaw like I did, and enjoy!


A photo posted by Liv Soutter (@livsoutter) on


Copyright © 2014 This Side of Paradise